Monday, August 31, 2020

iPhone Stuck on White Apple Logo - 4 Ways

Most of us like to use Apple's iPhone because of its fluent and powerful iOS system. However, many system-related issues will happen from time to time, especially when you have used the phone for several years. Among them, the iPhone stuck on the Apple logo is one of the most common problems. 

If you're also encountering such an issue, and still have no idea how to solve, you're in the right place. Here we're going to introduce four effective solutions to help you fix the issue immediately. Here we go. 

1. Hard Reset the iPhone

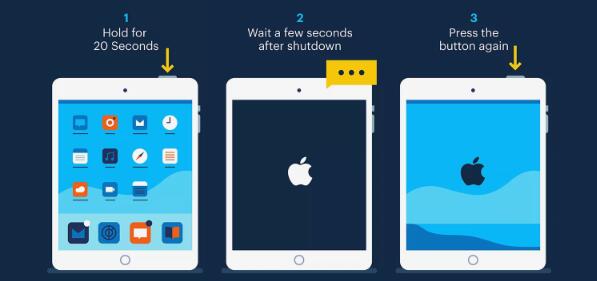
The first option you can try is to force restart your iPhone device. It is also the easiest solution to take when facing common iOS issues like iPhone stuck on Apple logo. Even if it may not work, it's still worth trying as the operation won't be harmful to anything on your device. Plus you can perform the hard reset without a computer.
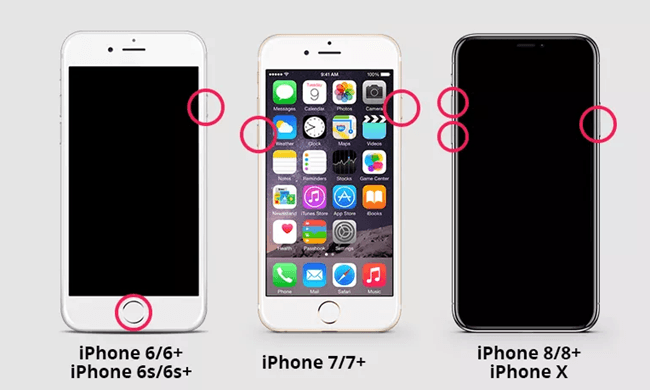
hard reboot iphone

1# On an iPhone 6s and earlier models,

Press and hold the Power button and Home button together until you see the Apple logo appear on the screen.

2# On an iPhone 7 and 7 Plus,

Press and hold the Volume Down button and the Power button for about 10 seconds. Release them until the Apple logo displays on the screen.

3# On an iPhone 8 and newer models,

Quickly press and release the Volume Up button, then hold down and release the Volume Down button. Finally press and hold the Side button until you see the Apple logo.

2. Fix iPhone Stuck on Apple Logo Without Restoring

It seems that you've become one of the 99% of users which means that the forcibly reboot didn't help to resolve the problem. All you can see from the interface remains the same, the iPhone won't turn on stuck on the Apple logo screen. The good news is, you can get your faulty device repaired with an outstanding iOS system recovery tool specifically developed by TunesKit Studio.

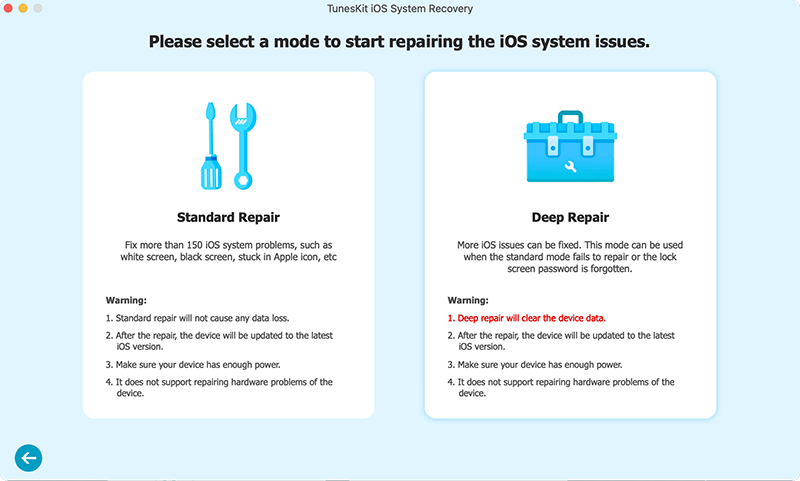
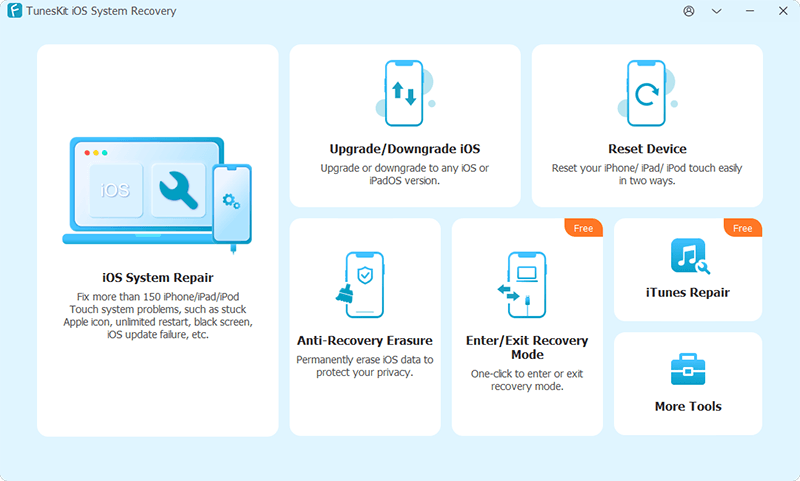
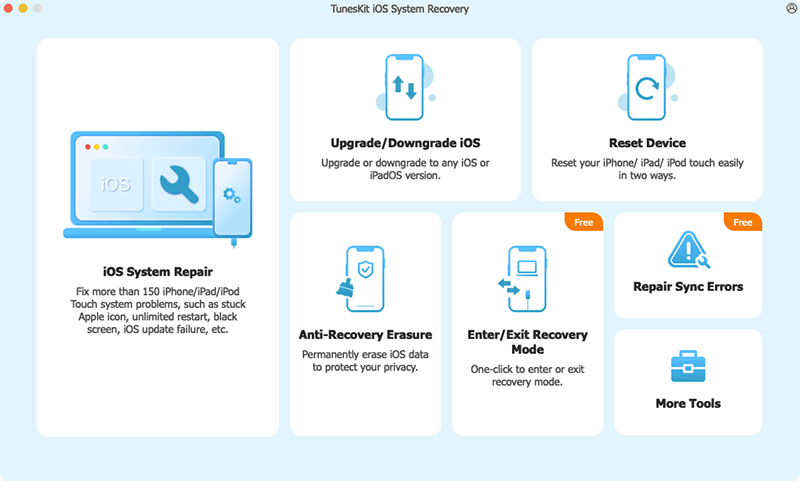
No matter which situation your iPhone is stuck in, this software, TunesKit iOS System Recovery can get rid of them in 2 smart repair modes, Standard Mode and Advanced Mode. It is totally user friendly as what you only need to do is to open it and connect your device. Then the software will handle the rest work for you and recover your iOS to normal causing no data loss or leak.
ios system recovery

Why Choose TunesKit iOS System Recovery?

  • Fix iPhone stuck on Apple logo without data loss
  • Repair over 50 iOS system issues successfully
  • Trusted by numerous customers and famous media
  • Work well on all iOS models and versions like iOS 13
  • The program is simple to operate

Step 1: Connect iPhone to the computer

Open the program and find a USB cable to connect your device to the computer. Tap on the Start option, and then set the repair mode as Standard Mode and click the Next button. After that follow the prompts from the window to put your iPhone into DFU mode and click the Next button once finished.
connect iphone

Step 2: Download firmware package

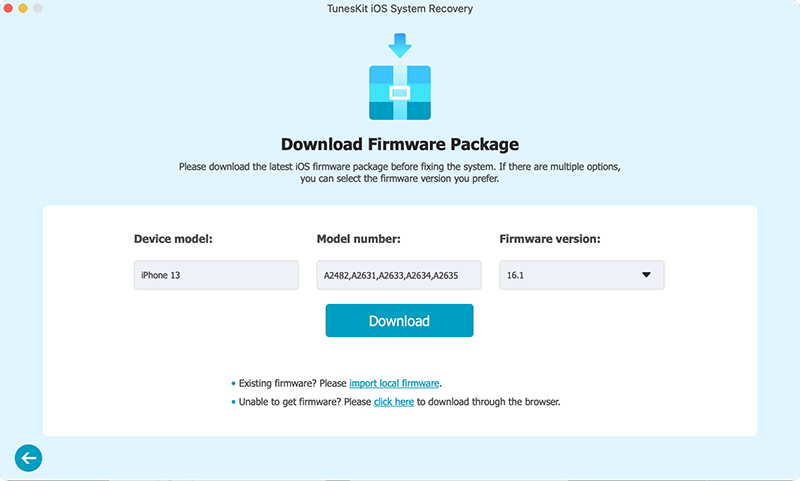
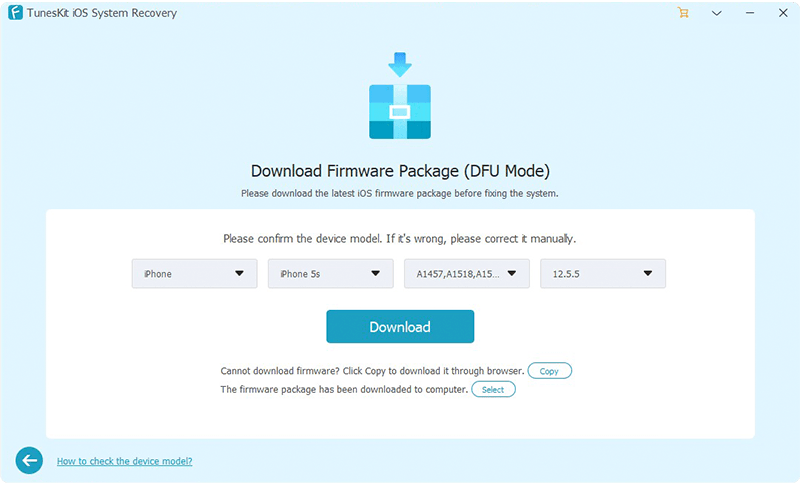
This software will download the firmware package matched to your iPhone. You need to confirm the device info before that. Correct it manually if any information is wrong. Then press the Download button at the lower right corner, TunesKit will then begin downloading and verifying the firmware.
download firmware

Step 3: Fix iPhone stuck at Apple logo

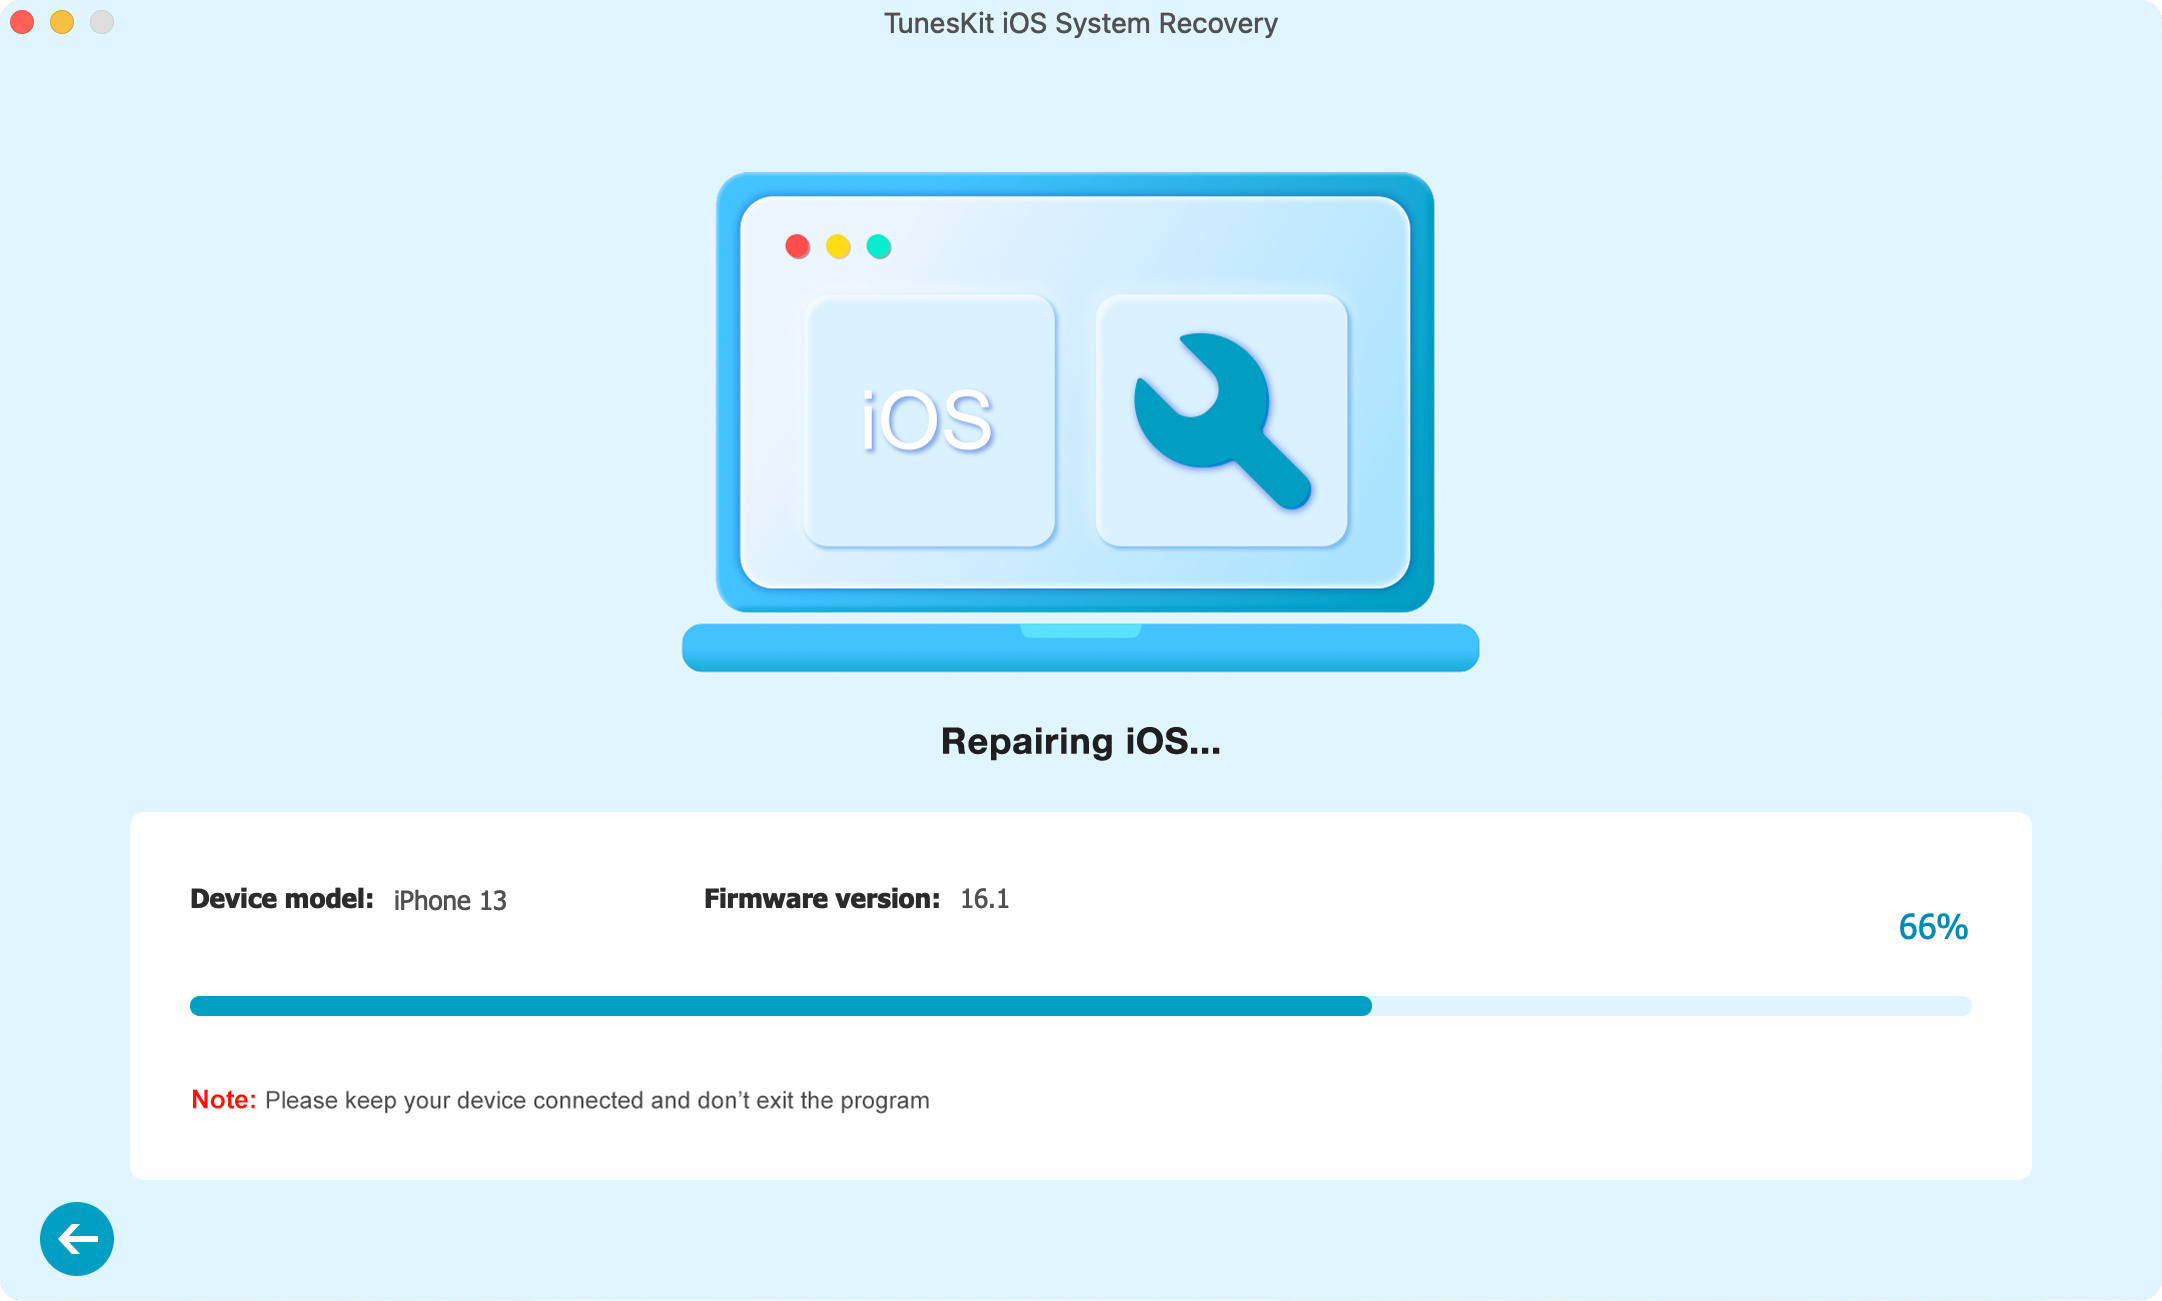
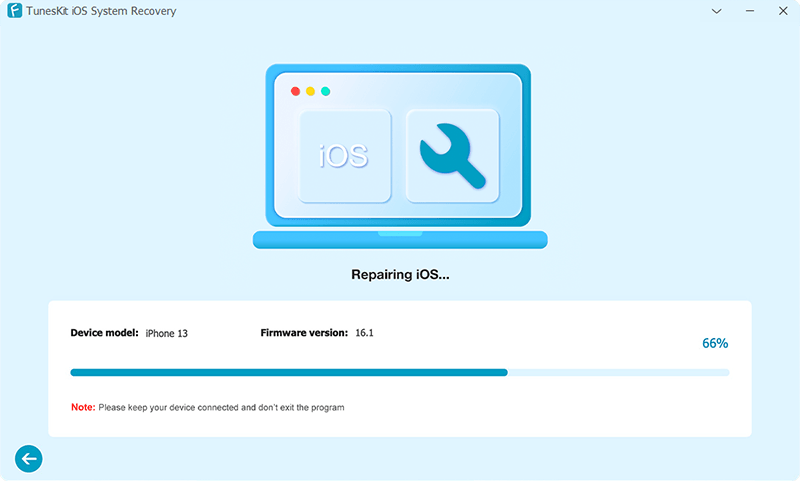
As soon as it completes the downloading process, just press the Repair option to let the software fix the error of the iPhone stuck on Apple screen. Keep your iPhone connected to the computer until the program finishes fixing. Or your device may get bricked unexpectedly.
fix ios

3. Put Your iPhone in Recovery Mode

There's another way to fix the issue of iPhone won't turn on and being stuck in Apple logo which is to put iPhone into recovery mode. However, all the files on your iPhone will be removed if taking advantage of this method. Therefore, just make sure that you've backed up your device to iTunes or iCloud previously. Before you get started, check the iTunes installed on your PC to see whether it is the most current version.

1# For iPhone 6s or older devices,

Step 1. Connect your iPhone to PC and launch iTunes. Hold both the Power button and the Home button at the same time.
Step 2. You will see the white Apple logo coming up. Do not release the buttons until the Connect to iTunes screen appears.

2# For iPhone 7 or 7 Plus,

Step 1. Connect your iPhone to the computer and open iTunes. Press the Power button and the Volume Down button concurrently.
Step 2. Similarly, the Apple logo screen will display. Simply hold them until you see the Connect to iTunes screen.

3# For iPhone 8 or later devices,

Step 1. Open iTunes and connect your iPhone to the computer. Press and fast release the Volume Up button, do the same thing on the Volume Down button.
Step 2. Press and hold the side button, release the buttons once the Connect to iTunes screen appeared.
iphone recovery mode

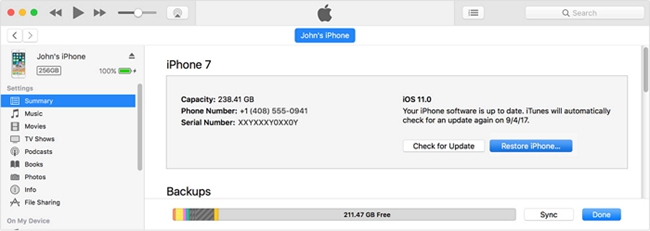
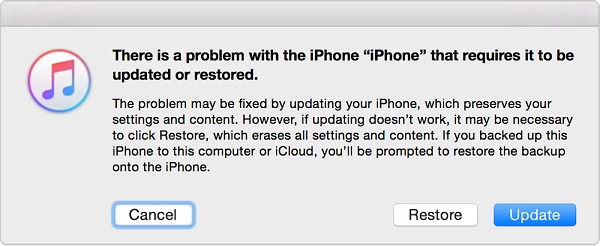
At this time you may need to tap on the Restore option from the interface since you've finished the process of entering recovery mode. Then just follow the prompts to restore your iPhone to fix the iPhone stuck on Apple logo issue.

4. DFU Restore Your Device

A DFU (Device Firmware Update) restore actually reloads the firmware (controls the hardware of your device) thoroughly but not only the software. This feature makes it different from other restoration types as well as the recovery mode. And it is the deepest type among all the iPhone restore.

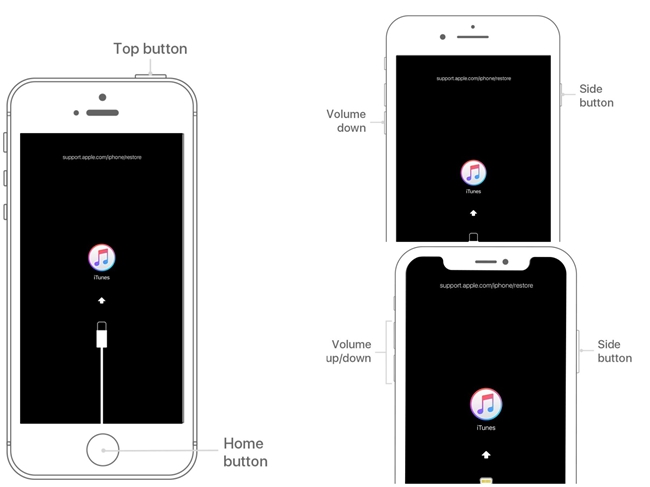
To go on with this mode of solving the problem, you will need to connect your device through a USB cable to your PC and sign in to iTunes. For the respective iPhone devices, you will need to initiate the pressing of the keys reminiscent of the force reboot manner. This is until a message pops saying that iTunes has detected a phone in recovery mode. After this release the buttons when the screen goes blank and you will be able to restore your device.
iphone dfu mode

Note: A DUF restore will deeply flush your device out and it may permanently mess your phone up. So please avoid using DFU mode and check the other options first.

The Final Words

Here are four ways to help you fix the issue when your iPhone is stuck on the white Apple logo, along with the detailed steps. You can try them one by one until your problem is solved. If you have other solutions or your problem has been fixed by using one of the aforementioned methods, please be happy to share it with me. 

Wednesday, March 18, 2020

[Review] 5 Best iOS System Recovery Software 2020

Whenever you found that your iDevice is troubled by some issues like stuck on Apple logo, white screen of death, iPhone stuck in reboot loop, keeps on restarting, etc., you may fix them after trying different tricks from Apple support or other sources on the Internet. But if you want to fix your iOS system problem without data loss, what you need is a professional iPhone repair software. To help you find out the most effective iPhone repair tools, here we have tested and collected 5 top-rated ones in 2020. You can keep on reading the review below.

No. 1 TunesKit iOS System Recovery

tuneskit ios system recovery
TunesKit iOS System Recovery for Mac/Windows ranks the top of the best iPhone repair software list. This tool is well designed to reach into the iOS/iPadOS/tvOS systems and fix various issues caused by it, which includes iOS software update failure, iPhone stuck in recovery mode, camera not working on iOS 13, iPad black screen, etc.
It offers two repair modes - Standard Mode and Advanced Mode. The former allows you to fix all kinds of common iPhone problems without erasing any data on the device, while the latter can help you repair some severe iOS system problems like iPhone is disabled or locked, etc.
In addition, TunesKit iOS System Recovery is easy to use and any person can easily handle it, even without referring to the tutorial. It is fully compatible with almost all iOS models and versions, including the latest iPhone 11 Pro Max, iOS 13.2, iPad Pro, iPod touch, Apple TV, etc.
Merits:
1. Easy-to-use iPhone repair software for Windows/Mac;
2. Repair different iOS issues without data loss;
3. Offer Standard and Advanced repair modes;
4. One click to enter/exit the recovery mode for free;
5. Bypass various iTunes errors efficiently.
Demerits:
1. The trial version offers no repair function.

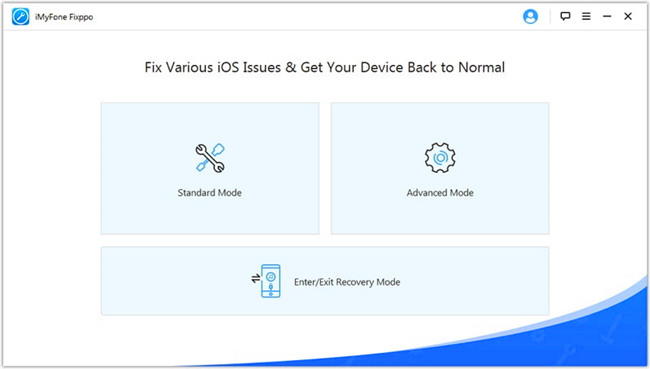
No.2. iMyfone Fixppo

imyfone fixppo
Another best iPhone repair software recommended here is iMyFone Fixppo iOS System Recovery. This program is capable of repairing some iOS issues like iPhone stuck in the spinning circle, iPhone is frozen, iPhone gets stuck in DFU mode, etc. Besides, it has claimed to help you downgrade your iOS to the lower version without jailbreak.
Merits:
1. Fix iOS issues with no data loss;
2. Put iPhone into recovery mode easily;
3. Repair iTunes problems as well.
Demerits:
1. The Advanced Mode will put you in a risk of losing data;
2. Sometimes it's hard to detect your device.

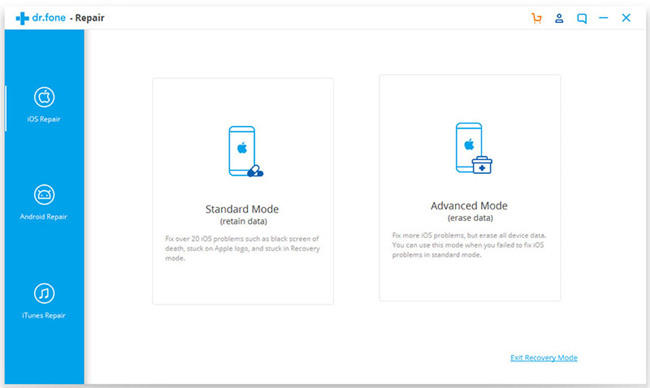
No.3. Dr.fone - Repair

drfone-repair
Wondershare has introduced a powerful iOS toolkit to help mobile users better enjoy their device and Dr.fone - Repair (iOS System Recovery) is one of them. It enables users to repair types of iOS problems without any technical skills when you meet iPhone white screen of death, Siri not working on iPhone, iPad won't turn on, iPhone recovery mode not working, etc. Similarly, this smart program works well with all iPhone, iPad, iPod models.
Pros:
1. No data loss while fixing the problem;
2. Support all the latest iOS models and versions.
Cons:
1. It's somewhat expensive.

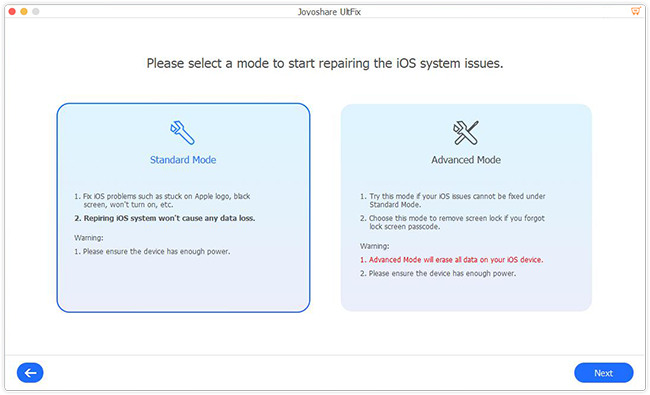
No.4. Joyoshare UltFix

joyoshare ultfix
Now let's come to the next useful iPhone repair software whose name is Joyoshare UltFix. This is a safe and trustworthy iOS system recovery tool that has the ability to fix over 30 different common or serious iOS issues such as iPhone stuck on black screen with spinning wheel, GIFs not working on iPhone, iPhone gets bricked, etc. More importantly, Joyoshare UltFix is able to repair the problem without causing any data loss.
Merits:
1. Powerful to fix iOS with high success rate;
2. Repair more than 30 kinds of iOS/iPadOS/tvOS issues;
3. Reset your iOS device to factory settings without password.
Demerits:
1. The trial version has limited features.

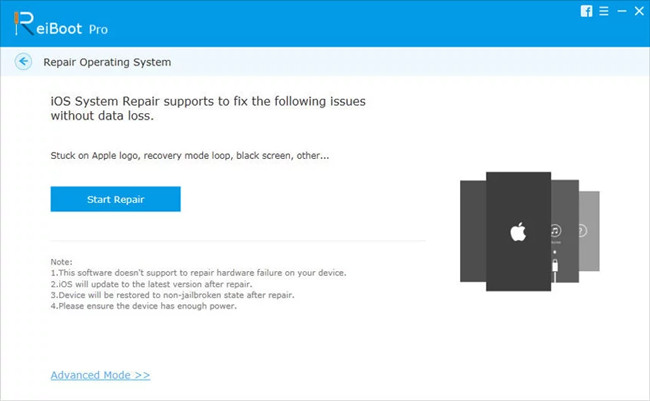
No.5. Tenorshare ReiBoot

tenorshare reiboot
The last one for the best free iPhone repair software is Tenorshare ReiBoot. Actually it only gives you a free option to enter or exit the recovery mode. When you start to repair your iOS issues such as iPhone stuck on Apple logo, recovery mode loop, screen is locked and won't turn on, you need to pay for it. Anyway, this iOS repair program can help you repair your iOS to normal without losing the data.
Merits:
1. One-click to get into recovery mode free;
2. Repair different system issues on iPhone/iPad.
Demerits:
1. Time-consuming to repair the iPhone issue;
2. The program is not stable and will crash at times.

Summary & Suggestion


So here are 5 best iPhone repair software tools we recommend for you. Each has its own merits and demerits and we have list them here. You can compare them and choose the best one that fully fits your needs. When you choose a iOS system repair tool, you'd better take some factors into consideration, such as powerful features, security, compatibility, success rate, price, ease of use, technical support, free download and upgrades, etc. And TunesKit iOS System Recovery might be the one that won't let you down. Now just get this iPhone repair software download free and have a try!
Source: https://www.tuneskit.com/ios-repair/top-iphone-repair-software.html

Thursday, December 19, 2019

How to Reset Apple TV without Remote

The tech giant has won great reputation in the streaming industry, as its Apple TV has been used by a growing number of customers. Sitting on the couch and watching those wonderful contents on the Apple TV can be very enjoyable, which is controlled by the Remote. However, what will you do when you lost the remote, and you need to reset the Apple TV in order fix some problems? Don't panic. You can find an appropriate Apple TV remote. In this article, we will show you 3 easy methods to restore or reset Apple TV without remote efficiently.

Method 1. Reset Apple TV with Remote App on Your iOS Device

If you lost the remote for your Apple TV, the first way to reset Apple TV without remote is to control the Apple TV with your iOS device. Now follow the quick steps below to see how to reset it.
Step 1. Download the Apple TV Remote application from the Apple Store on your device. Make sure your iOS device is connected to the same WiFi network with Apple TV.
Step 2. Launch the Apple TV Remote app and choose Add Apple TV and then select your Apple TV.
Step 3. Enter the 4-digit code on your device that comes out on Apple TV if asked. Now go to the "Settings" > "System" ("General" for 3rd generation and earlier models > "Reset" to factory reset Apple TV 4K without remote.

Method 2. Retore Apple TV with iTunes App on Computer

You can also use iTunes application to reset your Apple TV on the computer. The procedures are quite simple.
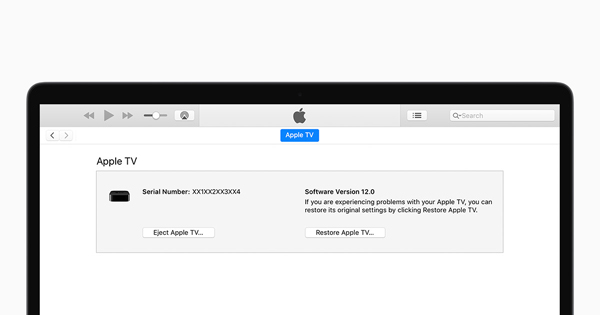
restore apple tv with itunes
Step 1. Remove all cables from your Apple TV, such as the power cable or HDMI cord. Then open the latest version of iTunes on your PC or Mac.
Step 2. Next connect your Apple TV to the computer with an original USB cable. For Apple TV 3rd generation and former, use micro USB cable; for 4K, use USB-C cord.
Step 3. Find your Apple TV icon on iTunes and then go to the "Summary" > "Apple TV" > "Restore Apple TV…". Now you can restore Apple TV without remote and wait until the process is done.

Method 3. Reset Apple TV with TunesKit iOS System Recovery

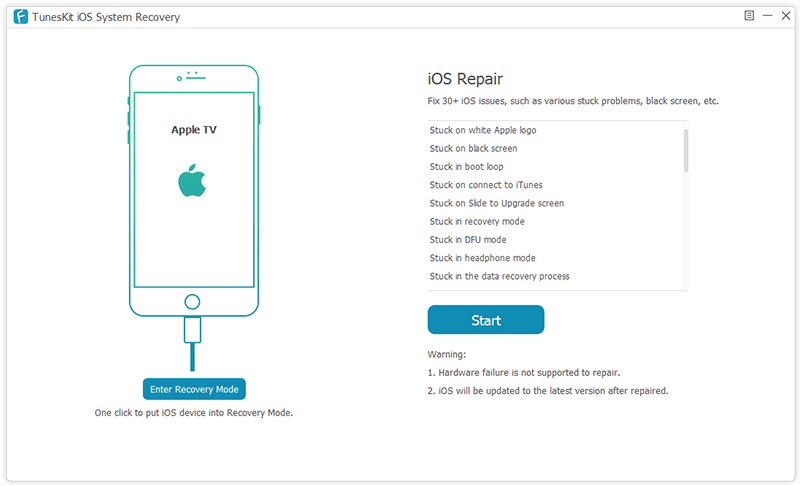
The third method is to use a third-party iOS repair tool such as TunesKit iOS System Recovery to reset Apple TV without remote. This is a professional iOS system recovery utility to help users solve various tvOS issues such as Apple TV remote not working, Apple TV won't update, black screen of death, Apple TV stuck in recovery mode, etc. It offers two recovery modes to ensure a super high success rate, including Standard Mode and Advanced Mode. Furthermore, it will give you the chance to fix all different problems without causing any data loss on your Apple TV HD, 3rd generation and 2nd generation models.
ios system recovery

Features of TunesKit iOS System Recovery:

  • Restore Apple TV without remote
  • Fix other Apple TV system problems easily
  • Repair tvOS issues with no data loss
  • Offer two repair modes
  • One click to enter recovery mode for free
900,000+ Downloads
DownloadDownload

How to Reset Apple TV or Fix tvOS Problems with TunesKit

In the following part, we will show you how to use the TunesKit iOS System Recovery to reset Apple TV with no help of Remote. Or you can also use TunesKit to fix other tvOS issues without data loss. Here we go.

Step 1Connect Apple TV to computer and open TunesKit

Use a USB cable to connect your Apple TV to your computer. Then download and install TunesKit iOS System Recovery program on the computer. Launch it after completed installation.
connect iphone

Step 2Download and verify firmware package

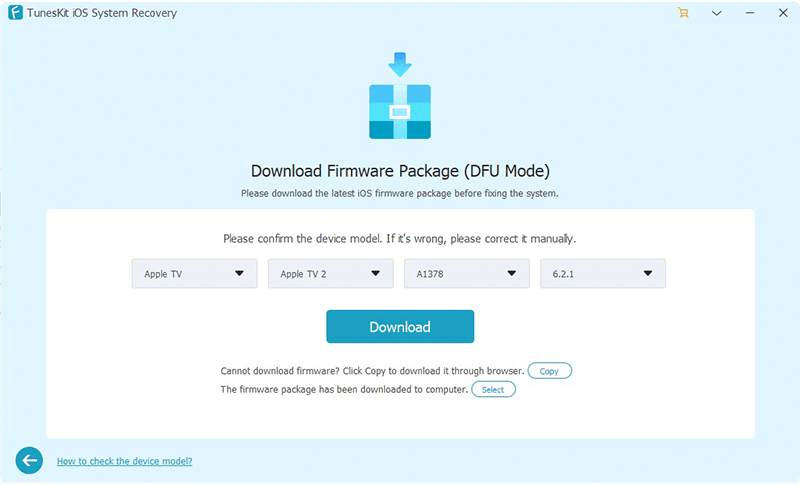
Once TunesKit detected your Apple TV, you can press the "Start" button to get started. On the next interface, choose Advanced Mode to reset Apple TV to factory settings, which will erase the data on it. If you don't want any data loss, you can choose the Standard Mode for fixing other tvOS problems. Then click the "Next" button to continue. Confirm your device info before click the "Download" button. It will take some time to download and verify the firmware package. Just be patient.
download firmware

Step 3Start to reset Apple TV

After the download comes to the end, click the "Repair" button and TunesKit will start to reset your Apple TV without remote. Wait for the process to finish. If it failed, you can try it again.
fix ios

Source: https://www.tuneskit.com/apple-tv-repair/reset-apple-tv-without-remote.html


Wednesday, December 11, 2019

iPhone Camera Not Working on iOS 13

Q: "Hello, both cameras of my iPhone X stopped working after updated to iOS 13. It just remained black. What can I do now? Is there any way to fix it?" – Mike from Apple Discussion
Recently, many iPhone users have complaint that they can't use their camera after iOS 13 upgrade, before enjoy better shooting feature. For example, camera just becomes black screen, blurry camera, camera cannot open or the camera app is missing after the update to iOS 13. If you're now experiencing the same problem of iOS 13 camera not working, you can read this post. Here we are going to introduce 8 possible methods to help you fix the camera not working issue on iOS 13, including the latest 13.2.

Method 1. Check Your iPhone Storage

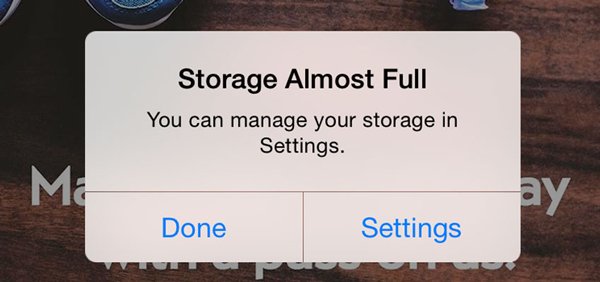
If your iPhone storage is almost full, there will be no more space for you to take photos. So you can first check your iPhone storage to see whether it's running up. Just go to the Settings app > General > About > Available to see if there is a suggestion showing 'iPhone Storage Almost Full'.
check iphone storage

Method 2. Close Camera App and Reopen

Sometimes, you camera app stops working is just because of the interference with other apps. So you can try to close the Camera app first and then reopen it.
close camera app
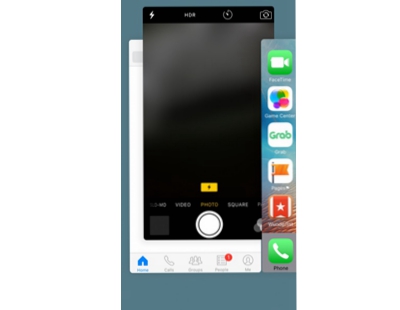
Step 1. Tap on the Home button twice (for iPhone models with Home button) or swipe up on the screen for a few seconds (for iPhone models without Home button), and you will see all the apps you've been using.
Step 2. Swipe to the left side and find the Camera app. Then swipe up on it to close the app. Open the Camera app again to see whether it works now.

Method 3. Reboot Your Device

Another simple method you can try to fix camera not working on iOS 13 is to reboot iPhone. It will close all the programs running in your device and give it a fresh restart. Different models have different procedures and the following is how.
restart iphone
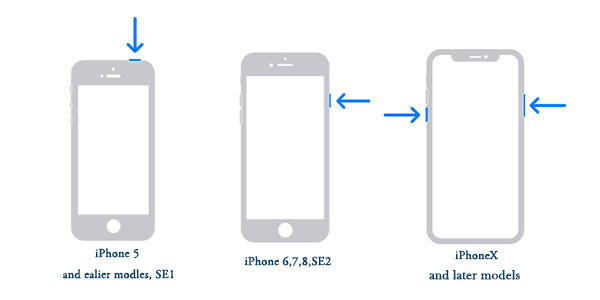
For iPhone X and later, keep pressing the Side button and Volume Up (or Volume Down) button and release them until the slider to power off appears on your screen. Then drag the slider to turn it off. Next press the Side buttons for a few seconds and release it when you see the white Apple logo.
For iPhone 8 and former, the procedure is almost the same. The difference is that you only need to press and hold down the Top (or Side) button to command the slider or Apple logo appear.

Method 4. Force Restart iPhone

If the simple restart failed to resolve iOS 13 camera not working problem, you can then try to force restart it. This could be the most straightforward way to solve almost all iOS glitches. Now follow the quick guide below.
hard reboot iphone
For iPhone 8 and above, you can press the Volume Up button and release it quickly. Then do the same for the Volume Down button. Next press and hold the Side button until the white Apple logo is visible.
For iPhone 7 and 7 Plus, keep holding the Volume Down and Power buttons at the same time and release them once you see the Apple logo come out.
For iPhone 6s and earlier, press the Home and Power buttons simultaneously. Release both until the white Apple logo appears on the screen.

Method 5. Update to the Newest Version

If your iOS 13 is just the debug version for Apple developers, you can then try updating to the latest one, in which some issues may have fixed, such as iOS 13 camera and flashlight not working.
update ios version
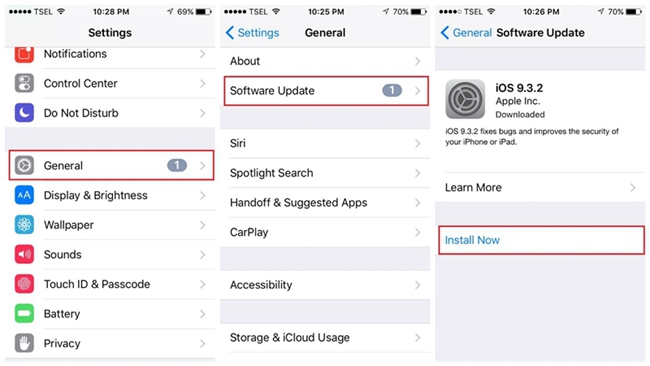
Step 1. Open your iPhone and go to Settings > General > Software Update.
Step 2. Tap it and press Download and Install if there is any update available. Keep your device in full power during the process.

Method 6. Reset Your iPhone

At times, your camera not working problem may be caused by the settings on your device. You can try to reset the iPhone settings to get it fixed. It will not cause any data loss on the data loss, but we still recommend you to make a backup for your data in case of any accident.
reset all settings
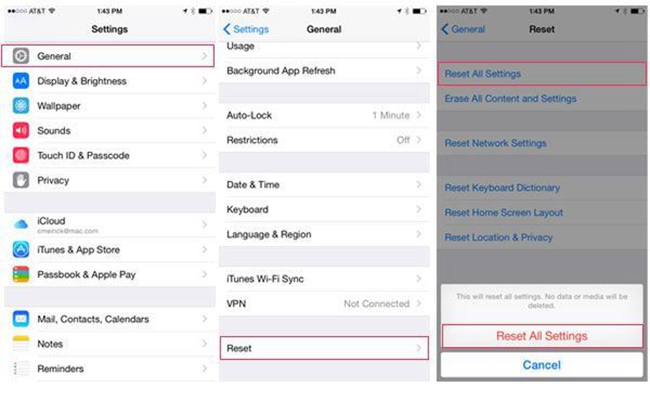
Step 1. Open you iPhone and go to Settings > General > Reset.
Step 2. Tap the Reset All Settings and confirm the action.

Method 7. Restore iPhone with iTunes

If resetting iPhone settings has not solve the camera not working after iOS 13 update, you can then try to restore iPhone completely. This will cause the data loss, so always remember to back up your important data before using this method.
restore iphone with itunes
Step 1. Open the latest version of iTunes app on your computer and connect your iPhone to it with a USB cable.
Step 2. Find your device and then go to Summary > Restore iPhone... Confirm the action and iTunes will start to restore your device and set it up as a new iPhone.

Method 8. Fix iOS 13 Camera Not Working without Data Loss

The last and efficient method recommended here is to use a professional iOS repair tool like TunesKit iOS System Recovery to fix your camera not working problem. This program is a dedicated to help users solve all kinds of iOS problems on iPhone, iPad and iPod touch, such as iPhone/iPad stuck in recovery modeSiri not workingwon't update softwareblack screen of death, etc. Most importantly, it will fix the problem of camera not working on iOS 13 without causing any data loss. Besides, it is fully compatible with the latest iOS versions and iPhone models.
ios system recovery

Features of TunesKit iOS System Recovery

  • Fix iOS 13 camera not working with no data loss
  • Repair various iOS issues on iPhone, iPad, iPod
  • Fully support the latest iPhone 11 Pro/11
  • Intuitive interface and simple to operate
  • Available for Windows and Mac platforms
600,000+ Downloads
DownloadDownload
Next download the TunesKit iOS System Recovery for free and start to fix your iPhone camera issue without data loss right now!

Step 1 Run TunesKit and connect iPhone to computer

At first, open TunesKit iOS System Recovery on your computer after finished the installation. Use an original USB cord to connect your device to the computer. Then click the Start button to begin and choose the Standard Mode on the next window.
connect iphone

Step 2 Download the firmware package

Next you can check your device info and correct it when you see some errors. Then click the Download button to download the required iOS firmware package for repair.
download firmware

Step 3Start to fix iOS 13 camera not working

Once the download process comes to the end, you can click the Repair button and TunesKit will start the repair. Wait a while and your device will get fixed.
fix ios

Watch Video: Easily Fix iOS Issues with TunesKit

Here you can view the following simple video to see how to use TunesKit iOS System Recovery to fix your camera not working on iOS 13 easily.

The Final Thoughts


So all the methods mentioned above are worth a shot. You can try them by yourself when you're facing the problem of camera not working after iOS 13 update. TunesKit iOS System Recovery is highly recommended here because it can fix the issue with no risk of losing any data on your device. If your camera problem is caused by hardware glitches, we suggest you to take it to the professional repair store or contact Apple Support for help.
Source: https://www.tuneskit.com/ios-repair/ios-13-camera-not-working.html

Monday, December 9, 2019

Howto: Fix iPhone/iPad Recovery Mode Does Not Work

Q: "Some errors might occur to my iPad. I tried to connect it to iTunes and use recovery mode, the recovery mode not working! Can someone tell me how to fix this problem?" – Jenny from Apple Discussion
Recovery mode is a powerful feature that you can use to fix some problem with your iOS devices such as iPhone, iPad and iPod touch. It can help us solve a lot of software-related issues by reinstalling the software on your device. However, the iPad or iPhone recovery mode not working happens from time to time. If you come across this issue while using the recovery mode, you can read this post to learn 5 solutions to resolve the problem.

Tip 1. Update iTunes App to the Latest

This can be a simple solution to iPhone/iPad recovery mode not working problem. Sometimes all iOS issues can be easily fixed by updating the iTunes program version. The following is the quick steps.
update itunes
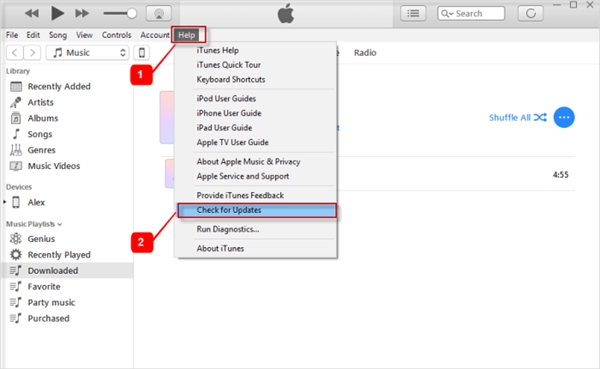
For Windows, open iTunes and go to the Help on the top menu bar > Check for Updates > Install. If your iTunes program is downloaded from Microsoft store, it will be automatically updated.
For Mac, launch iTunes app and navigate to Updates. If there is iTunes update available, just click on Update.

Tip 2. Force Restart Your iPhone/iPad

If your iPhone recovery mode restore not working still exist after updating iTunes, you can then try to force reboot your device. This can resolve most minor problems with iPhone or iPad. Different models have different procedures, yet it is still simple to operate. Here it is:
force restart ipad
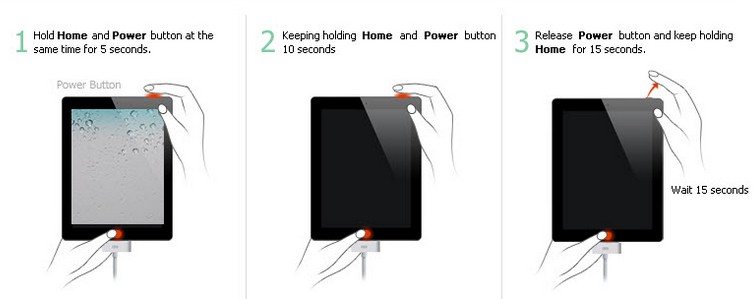
For iPad (with Home button), iPhone 6s and former, press and hold the Home and Power buttons simultaneously. Release both buttons until you see the Apple logo on the screen.
For iPhone 7 and 7 Plus, press and hold the Volume Down and Power buttons. Release them when the Apple logo comes out.
For iPad (without Home button), iPhone 8, X and newer series, press the Volume Up button and then quickly release it. Do the same for the Volume Down button. Then hold the Power button until the Apple logo is visible.

Tip 3. Use DFU Mode Instead of Recovery Mode

If your iPhone, iPad recovery mode does not work when you try to use it to repair your device software problem, you can still use another mode named DFU Mode to fix the iOS problem. DFU is short for Device Firmware Upgrade, which can be used to fix serious software-related problems on your device. So it can be an effective option to recovery mode. However, putting iOS device into DFU mode is much difficult and many users have reported that they failed to do so. Besides, the data on the device might be lost. Anyway, if you don't mind you still have a try.

Step 1. Launch the latest version of iTunes on your Mac or PC computer. Use a USB cable to connect your iPhone or iPad to the computer.

Step 2. Manually put your device into DFU mode. When it succeeds, you will see a message on your screen, saying "iTunes has detected an iPhone (or iPad) in recovery mode".

Step 3. Click the OK button and then press the Restore iPhone button to confirm your action. Wait a while until the process completes.

P.S. The detailed steps for different iPhone/iPad models to enter the DFU mode manually:
put ipad into dfu mode
For iPad, iPhone 6s and earlier, press and hold Home and Power buttons simultaneously for about 8 seconds. Release Power button but keep pressing the Home button until the screen turns black.
For iPhone 7 and 7 Plus, press and hold the Volume Down and Power buttons at the same time for about 8 seconds. Release Power button but keep holding the Volume Down button until the screen is black.
For iPad (without Home button), iPhone 8, X and later, press the Volume Up button and then release it quickly. Then press the Volume Down button and then release it quickly. Next hold the Power button until you see the screen become black.

Tip 4. Use TunesKit iOS System Recovery Instead of Recovery Mode

As mentioned above, if you use DFU mode to fix iPhone, iPad recovery mode doesn't work, you're in a big risk of losing the data on your device. So if you don't want any data loss, you can try this iTunes alternative - TunesKit iOS System Recovery (or for Mac).
It is a professional iOS repair tool that is able to fix over 30+ types of iOS problems, which covers almost all issues that recovery mode can resolve, including iPhone recovery mode not working problem. Moreover, you can use this program to put iPhone or iPad into recovery mode in one click for free. In addition, this program allows users to repair iOS problems without data loss in a few clicks only.
ios system recovery

Features of TunesKit iOS System Recovery

  • Solve iPhone/iPad recovery mode not working easily
  • Fix various iOS problems with no data loss
  • One click to enter/exit the recovery mode with no charge
  • Easy to operate with clear interface
  • Available for Mac and Windows systems
600,000+ Downloads
DownloadDownload
Now follow the simple steps below to effectively fix iPad/iPhone recovery mode not working issue with TunesKit iOS System Recovery.

Step 1Connect device to computer and Launch TunesKit

connect ios device
Open TunesKit iOS System Recovery on your computer after finished installation. Connect your iPhone or iPad to the computer with a USB cable. Click the Start button on the main interface once it's recognized by the software. Choose the Standard Mode and click on the Next button to proceed.
select standard mode to repair without data loss

Step 2Download Firmware Package and Verify

Check the device information and manually correct it if there is wrong info detected. Next press the Download button and ask TunesKit to download the related iOS firmware package and then verify it.
confirm information

Step 3Start to Fix iPhone/iPad Recovery Mode Issue

When the download is done, click on the Repair button and the program will starting fix iPhone recovery mode not working issue. Wait for the process to compete and you can then use your device as usual.
fix iphone recovery mode not working

Tip 5. Ask Apple Support for Help


After trying all these methods, but your iPhone, iPad recovery mode not working problem is still not resolved, you can then trying getting in touch with Apple Support for help. It may be caused by hardware issue that is difficult to deal with. Apple Support team will help you detect the reason and provide your professional assistance for you.
Source: https://www.tuneskit.com/ios-repair/ipad-iphone-recovery-mode-not-working.html

Thursday, December 5, 2019

5 Solutions to iPod Touch Won't Turn on or Charge

Whether you have an iPod touch, iPod nano, iPod shuffle, or iPod classic, you may face this problem: my iPod is not turning on? So why does this happen and how can I fix this issue effectively? Now follow us to diagnose the problem and see if you can get it workable again by yourself.
First let's explore the reasons that cause your iPod touch not turning on even when you're trying to charge it. Generally speaking, there are three situations:
* Your device is in zero battery or the battery is completely drained, especially when you haven't used it for a long time.
* There are some software errors or iOS system glitches, which could cause the iPod touch not to turn on.
* Hardware issues happened to your iPod touch, for example, the battery is damaged or other components have broken, etc.
After analyzed the possible reasons for iPod touch won't turn on, now let's move to the detailed solutions to get it fixed.

Tip 1. Charge Your Device

As we mentioned above, you cannot turn on your iPod touch which may be caused by low battery. So the first and foremost method you should try is to charge your device directly. The following is the simple steps:
Step 1. Connect your device to the original charging cord. Plug the other end of this cable into a wall outlet or a computer host.
Step 2. Wait for at least 30 minutes until your iPod touch is fully charged.

Tip 2. Reboot your iPod Device

If your iPod won't turn on or charge, you can force restart it. This has been considered as one of the simplest ways to fix most iOS device problems. Different iPod models have different method to reboot. Just have a try.
force restart ipad
For iPad touch (7 Gen), press and hold Top button and Volume Down (Home for 6 Gen and earlier) button at the same time for seconds, release them once you see the Apple logo come out.
For iPod nano (7 Gen), you should press and hold Home and Sleep/Wake buttons simultaneously until you see the screen turns off. Wait for your iPod touch to restart.
For iPod shuffle, first unplug it from the power adaptor and computer, and then turn it off by using power switch. When you see it turns green, it means your device is on. Wait for 10 seconds and then restart iPod shuffle again.
For iPod classic, firmly move the Hold switch to the Off and then press the Menu and Center/Select buttons at the same time for a few seconds until the Apple logo appears.

Tip 3. Fix iPod Touch Won't Turn on with No Data Loss

Another easy solution you can try is to use a third-party iOS repair tool if your iPod touch not turning on is caused by some software glitches or iOS system issues. Here I'd like to introduce TunesKit iOS System Recovery, a simple-to-use yet professional iOS repair software for Windows and Mac.
This software is able to repair over 30 different types of iOS problems like your iPod touch/iPhone/iPad stuck in recovery, black/white/blue/red screen of death, software update errors, etc. TunesKit iOS System Recovery offers two repair modes (Standard Mode and Advanced Mode) to help users solve all kinds of troubles with highest success rate. Moreover, by using this professional tool, you're not in a risk of losing any data on your iPod touch device.
ios system recovery

TunesKit iOS System Recovery Features

  • Efficiently resolve iPod touch won't turn on issue
  • Fix various iOS problems without data loss
  • Two repair modes are provided
  • Fix problems on iPod, iPad, iPhone, Apple TV
  • Clear interface and the steps are simple
600,000+ Downloads
DownloadDownload
Now select the right version of TunesKit iOS System Recovery to download and then use it to fix iPod touch not turning on issue without data loss by following the quick steps below.

Step 1Run TunesKit and connect iPod to Mac/PC

Open TunesKit iOS System Recovery program on your computer once the installation is done. Connect your problematic iPad touch to the computer with an original cable.
connect iphone

Step 2Download iOS firmware package

Once your device is detected by TunesKit, click the Start button and then choose the Standard Mode in the next windows. Proceed to confirm your device info and then click the Download button at the right bottom corner to ask the program to download and verify the related iOS firmware package for you.
download firmware

Step 3Fix iPod touch won't turn on problem

Wait for the download to complete. Next press Repair button and TunesKit will start to fix the iPod touch problem immediately. Once the process ends, check your device to see whether it works. If not, you can try TunesKit again or switch to the Advanced Mode to have a try.
fix ios

Tip 4. Restore Your Device via iTunes

This method is not strongly recommended because restoring iPod touch with iTunes will erase all the data on your device such as songs, photos, etc. Thus we suggest you to back up your iPod data before trying it. If you have done so or you don't mind the loss of data, you can follow the steps below.
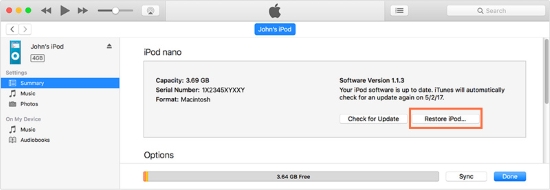
restore ipod with itunes
Step 1. Launch the latest version of iTunes on your computer and then open it.
Step 2. Connect your iPod touch to the computer and iTunes will detect it automatically. Click your device icon and the go to the Summary > Restore.
Note: If your device is iPod nano or iPod classic, you need to put it in the Disk Mode first.

Tip 5. Get in Touch with Apple Support or Technical Staff

After trying all the aforementioned methods, if your iPod touch will not turn on all the same, it may be due to some hardware glitches. In this case, you're suggested to contact Apple Support team to get it fixed or take your device to a technical repair shop to have a check. Don't dissemble it by yourself, otherwise you may destroy it. Even if you are a professional, you still cannot get it fixed for free under warranty once you open it.

Summary & Suggestion


So, you've got several ideas to repair your iPad touch won't turn on problem. You can follow the tips one by one until your issues is resolved. Among the methods, using TunesKit iOS System Recovery might be the easy and most efficient way to fix iPod touch problem quickly. It can deal with almost all iPod touch system or software issues while preserving all the data on the device. If you're looking for such a solution, why not give it a shot?
Source: https://www.tuneskit.com/ios-repair/ipod-touch-not-turning-on.html

Tuesday, December 3, 2019

iPad Stuck in Recovery Mode? Fixed!

Q: "I use iPad Air 2. I decided to update it to iOS 12 after backed up my iPad to the computer. Then I downloaded the update and it started. Yet an error appeared and my pad screen stayed at the recovery mode. How can I fix this problem? Please help me!" - Rick from iFixit
Sometimes when you're trying to upgrade your iOS system, restore iPad or restore backup file to your iPad, you may encounter the issue like iPad stuck in recovery mode loop. So is it really that I can do nothing to fix this problem? Not really. In this article, you will learn 5 possible methods to help iPad users fix iPad stuck in recovery mode efficiently.

Part 1. How to Force Restart Your iPad

For most iOS system problem, the first method you should try is to force restart your device. Fixing iPad stuck in recovery mode is no exception. It's easy to do this and the following is the quick steps.

Step 1. Press and hold the Home button (on the front of the device) and Power button (on the top of the iPad) simultaneously.

Step 2. Keep holding both buttons until you see the Apple logo on the screen.

Step 3. Next release the buttons and wait a while until the start sequence completes. Enter your password to start once your problem is fixed.

force restart ipad

Part 2. How to Manually Exit iPad Recovery Mode

If you are a senior iOS user, you must know that we can manually put iPad into recovery mode by pressing some buttons. Thus, when your iPad stuck in recovery mode and wont restore, maybe you can also try to exit the recovery mode manually. Here is how.

Step 1. Connect your iPad to the computer with a USB cable. Then open the latest version of iTunes on your computer, and wait a moment until iTunes detects your iPad.

Step 2. Next press the Home button and Power button at the same time for about 10 seconds and then let go off both buttons.

Step 3. Now tap the Power button immediately and wait until it works normally.

Part 3. How to One Click to Exit iPad Recovery Mode

The third method we recommend here is to use a free tool to help your iPad exit the recovery mode in one click and this powerful software is named TunesKit iOS System Recovery.
This is actually a versatile iOS related repair utility that help users fix up to 30+ various iOS issues such as iDevice stuck and unresponsive problems, screen display problems, or more serious issues like screen is locked, etc. The most important point of TunesKit iOS System Recovery is that it will retain all your existing data on the device while repairing your system problems. Besides, the free trial version allows you to enter or exit iPhone or iPad recovery mode within one click, so we can try using this function to fix iPad stuck in recovery mode problem now.
Before we show you the detailed instruction, you need to download and install this program on your PC or Mac. After that, you can follow the steps below to use it.

Step 1Launch TunesKit and connect iPad to the computer

Launch the TunesKit iOS System Recovery software after finishing the download and installation. Use an original USB cord to connect your iPad to the computer. The software will detect your device.
connect iphone

Step 2Exit iPad recovery mode

After your iPad is successfully recognized by the program, it must be shown in the recovery mode already. If so, you can simply click the left blue Exit Recovery Mode button to let TunesKit help you exit the recovery mode automatically.
If not, you can just click the Enter Recovery Mode option and wait a while until it's in this state. And then do the same operation to exit the mode.

Part 4. How to Fix iPad Stuck in Recovery Mode without iTunes

If the above methods are not working and also you don't want any data loss, you can still use TunesKit iOS System Recovery to help you fix iPad stuck in recovery mode without iTunes and without data loss. As we said before, TunesKit is a professional iOS repair tool, so it is also capable of repairing such stuck problem. With advanced technologies adopted in this program, you can get the highest successful recovery rate. Now just follow the simple step-by-step guide below to fix it right now.

Step 1Connect your iPad to computer

Like above, you also need to connect your device to the computer and open TunesKit iOS System Recovery program. Afterwards, click the Start button to begin and choose the Standard Mode on the next interface to proceed.

Step 2Download and verify firmware package

Next you should check your device info and correct the data if something is not right. Then hit the Download button and TunesKit will start to download and verify the iOS firmware package that matched to your device.
download firmware

Step 3Fix iPad stuck in recovery mode

Once the download is done, you can now click the Repair button to let the software to fix your iPad problem instantly. Wait for the process bar ends and your iPad will get out of the recovery mode successfully. If not, you can try it again or switch to the Advanced Mode to fix it completely.
fix ios

Part 5. How to Fix iPad Stuck in Recovery Mode with iTunes

The last method you can rely on to fix iPad stuck in recovery mode is to restore your iPad with iTunes. This solution will erase all the data on your iPad, so we don't recommend you to try this method unless you have made some backup for your iPad data. If so, you can then follow the steps below to resolve the problem.

Step 1. Open iTunes app and update it if it's not the newest version and then plug your iPhone to your computer.

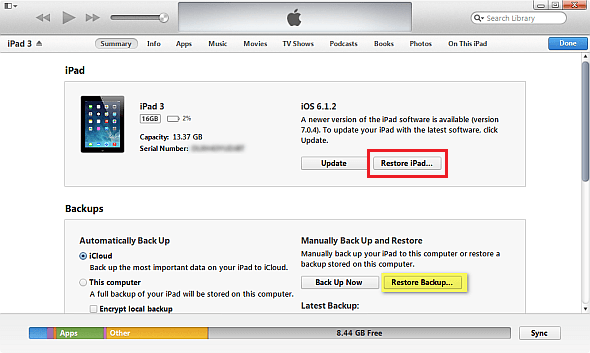
Step 2. The iTunes will detect that your device is in the recovery mode, click the OK button and then hit the Restore iPad under the Summary panel to restore your iPad, with all data erased.

Step 3. Confirm Restore option again and wait until the process comes to the end. You can then recover your data from iTunes or iCloud backup file.

restore ipad with itunes

More Q & A about iPad Recovery Mode

1. What is iPad recovery mode?

iPad recovery mode is a failsafe state on iPad to help users update or restore the iPad with a new operating system. Different from Device Firmware Upgrade (DFU) mode, it won't bypass the device's bootloader and will install a modified or new firmware package. You need iTunes program to help upgrade or restore your iPad.
See more: DFU Mode vs. Recovery Mode: What're the Differences?

2. When will I use iPad recovery mode?

You'd like to use iPad recovery mode under several circumstances, for instance,
Your iPad stuck in recovery mode loop after update or get stuck in the restart loop or other states and cannot responsive while you’re updating your iOS system; The process isn't completed when you're restoring your iPad from the backup and meantime iTunes cannot recognize your device; Your iPad screen turns white, black, blue or red due to some unknown reasons, etc.
So just list a few of them, and of course there are many other situations that you may want to put your iPad into the recovery mode.

3. How can I put iPad in recovery mode?


To place your iPad into recovery mode, you have to first connect your device to the computer and open iTunes, and then keep hold the Power button and Home button simultaneously until white Apple logo appears. Keep holding these two buttons until you see an arrow pointing to iTunes icon appears on the screen, which means that your iPad is now in the recovery mode.
Source: https://www.tuneskit.com/ios-repair/fix-ipad-stuck-in-recovery-mode.html